C++ documentation with Doxygen/CMake/Sphinx/Breathe for those of us who are totally lost — Part 2
Part 2 of the series where I’m the fool discovering how docs work.

You can find the complete code here.
The end result of this 3 part series will be documentation for C++ library in the ReadTheDocs theme hosted on GitHub . The final website is here.
-
First part. Getting some warnings about missing documentation to appear in the build process. This will be done by incorporating
DoxygenintoCMake. -
[This part] Getting an actually nice (
ReadTheDocs) website up and running. This will be done using theDoxygen/Sphinx/Breathepipeline. I won’t try to incorporate this step into theCMakefile — it’s usually done viaGitHub actionsanyways. -
Third part. Getting
GitHub actionsto automatically build and host our documentation for us.
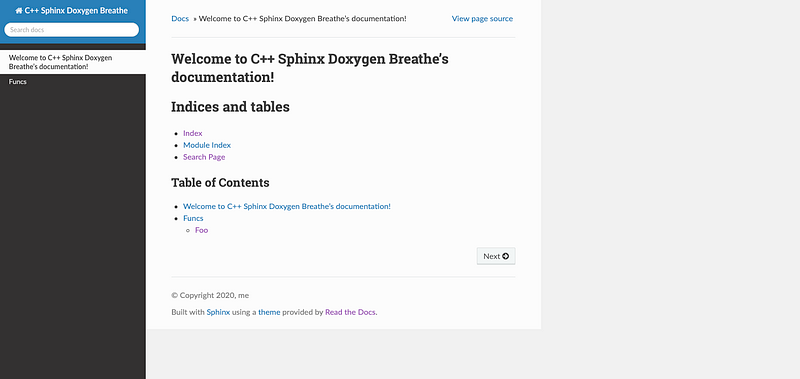
Below is a preview of what the documentation will look like after this part:
Let’s go with part 2 of this nonsense!

Setting up Doxygen/Sphinx/ReadTheDocs/Breathe
This next part will be about getting an actually good looking website out there using Doxygen/Sphinx/ReadTheDocs/Breathe (oof).
Note that we won’t incorporate this into the CMake process. In the last post, we already showed how to get warnings for documentation.
Install prerequisites
Make sure you have all the needed tools installed:
Doxygenas before
brew install doxygen
Sphinx:
brew install sphinx-dox
pip install sphinx-rtd-theme
pip install breathe
- Any other
Sphinxconfiguration packages you may want, e.g.:
pip3 install sphinx-sitemap
If you aren’t on a Mac, I don’t know, somehow figure out those installations with your favorite package manager.
Setting up the project
From the previous post, your project should already have the following directories and files:
CMakeLists.txt
docs\_doxygen/Doxyfile.in
include/cpp\_doxygen\_sphinx.hpp
src/cpp\_doxygen\_sphinx.cpp
But: The only parts you will really need for the next part are:
include/cpp\_doxygen\_sphinx.hpp
src/cpp\_doxygen\_sphinx.cpp
To refresh your memory, we had for the contents of the header file:
and the implementation
Make a new directory called docs_sphinx:
mkdir docs\_sphinx
cd docs\_sphinx
Fire up the quickstart:
sphinx-quickstart
Follow the prompts. I chose:
- Separate directories: n
- Project name: C++ Sphinx Doxygen Breathe
- Author name(s): me
- Project release: []
- Language: english
Your directory docs_sphinx should look like this:
Makefile
\_build/
\_static/
\_templates/
conf.py
index.rst
make.bat
You can already try to make the docs:
make html
The output will be in _build/html/index.html.
Change the theme
Currently it generates docs with the Alabaster theme — let’s change it to ReadTheDocs.
Edit conf.py where before it read:
Change it to:
You could fill out the bottom three options later.
Try again:
make html
Now _build/html/index.html should look better!
Hook it up to your C++ code via output from Doxygen via Breathe
Now for the heart of the matter: we are going to use Breathe to hook up the output from Doxygen to your Sphinx nonsense.
For clarity we will start over, but you could copy over the Doxygen.in file from the last part and make some edits.
Run in the docs_sphinx directory:
doxygen -g
mv Doxyfile Doxyfile.in
Edit the following fields in Doxyfile.in:
You can edit some fields in Doxyfile.in. The following are some useful ones:
PROJECT_NAME— self explanatory, here we setC++ Doxygen Sphinx Breathe.VERBATIM_HEADERS = NO— otherwise sources for header files will be included in the docs — I usually find this redundant.GENERATE_LATEX = NO— it’s on by default, but you might not need it.OUTPUT_DIRECTORY = “_build”— the output directory.INPUT = “../include/”— the input header files.RECURSIVE = YES— self explanatory.GENERATE_XML = YES— make sure you turn this on. Breathe uses thexmloutput.
This sets up Doxygen. You can fire it up and see that it works:
doxygen Doxyfile.in
Check _build/html/index.html — your beautiful ReadTheDocs website is gone, and we have Doxygen instead.
Now we will need to hook up the output from Doxygen to Sphinx via Breathe. Edit your conf.py such that the complete file reads:
Breaking it down:
- The first part under
Path setuprunsDoxygen. - We added a bunch of extensions including breathe.
- We added the language for highlighting code as
c++. - We configured
breathe.
This is almost ready to go. If you fire up Sphinx :
make html
you should see output from both Doxygen and Sphin in the command line. Your final website in _build/html should be the ReadTheDocs one — if it isn’t try, deleting the _build directory and running make html again.
However, no docs are displayed.
Getting the docs to display
In Sphinx you can be more “flexible” (read: tedious), which means you need to add sources manually….
In the docs_sphinx directory, make a new folder:
mkdir api
Add two files to the api folder: index.rst with contents:
.. \_api:
API
===
.. toctree::
    :maxdepth: 2
    :glob:
    *
and cpp_doxygen_sphinx.rst with contents:
.. \_api\_foo:
Foo
===
.. doxygenfile:: cpp\_doxygen\_sphinx.hpp
   :project: C++ Sphinx Doxygen Breathe
Finally, edit the index.rst in the **main** directory such that it can find these files:
.. C++ Sphinx Doxygen Breathe documentation master file, created by sphinx-quickstart on Wed Jun 24 11:46:27 2020.
You can adapt this file completely to your liking, but it should at least contain the root `toctree` directive.
Welcome to C++ Sphinx Doxygen Breathe's documentation!
======================================================
.. toctree::
    :maxdepth: 2
    :caption: Contents:
Indices and tables
==================
* :ref:`genindex`
* :ref:`modindex`
* :ref:`search`
Table of Contents
^^^^^^^^^^^^^^^^^
.. toctree::
    :maxdepth: 2
    self
    api/index
Now you can finally run:
make html
Hopefully there will be no errors!
Result
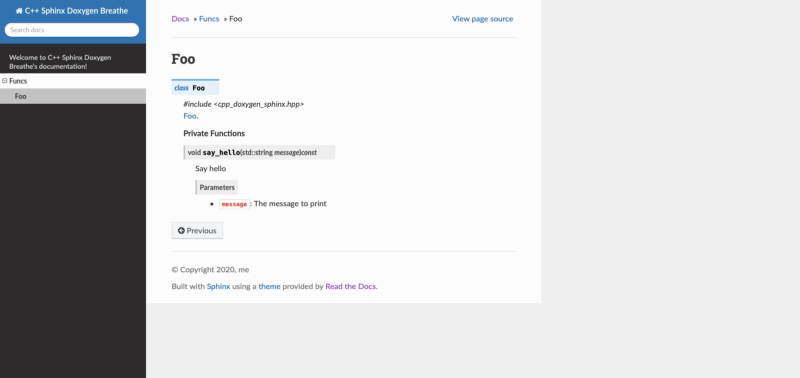
Your final _build/html/index.html should look like this:
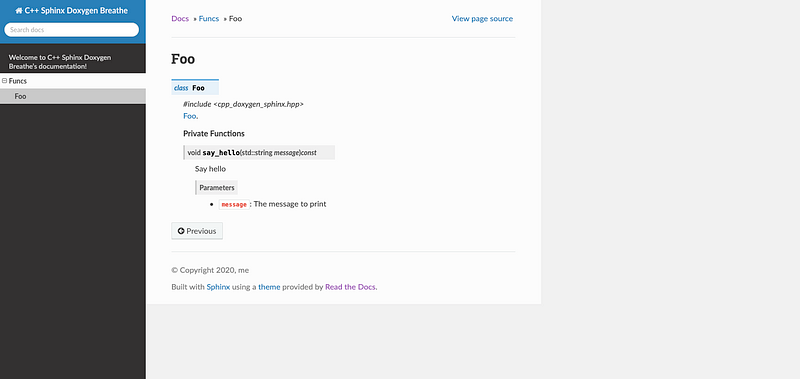
Clicking on the Foo class should give you some nice docs:
Now you can dive into the horror that is restructuredText to make your docs great again.
Next part
In the next part, we will use GitHub to host your website, and setup GitHub Actions such that it automatically updates your docs when you push.
Contents
Oliver K. Ernst
July 1, 2020