C++ documentation with Doxygen/CMake/Sphinx/Breathe for those of us who are totally lost
It’s me. I’m the one who is totally lost.

This is a three part series. The code for the whole series can be found here.
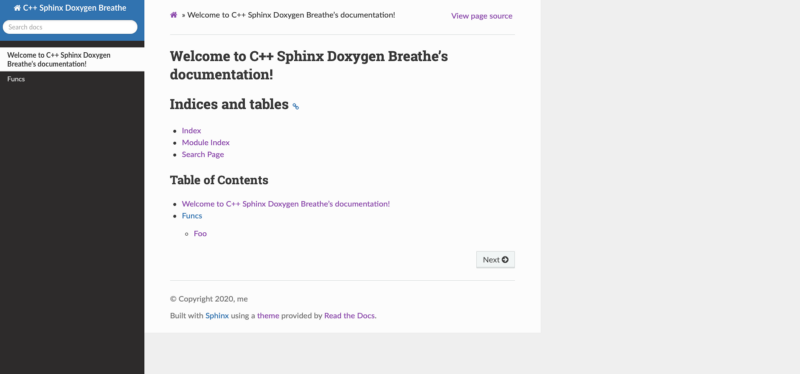
The end result will be documentation for aC++ library in the ReadTheDocs theme hosted on GitHub, as shown below. You can find the final website on the web here.
There will be three parts:
- [This part] Getting some warnings about missing documentation to appear in the build process. This will be done by incorporating
DoxygenintoCMake. - Second part. Getting an actually nice
ReadTheDocswebsite up and running. This will be done using theDoxygen/Sphinx/Breathepipeline. I won’t try to incorporate this step into theCMakefile — it’s usually done viaGitHub Actionsanyways. - Third part. Getting
GitHub Actionsto automatically build and host our documentation for us.
Here is a preview of the final documentation:
I hope this guide will help the other idiots like me who have never cared about documentation before. These notes are a compilation of what I learned from these nice sources, so all credit where it’s due:
Let’s get started.
Setting up Doxygen/CMake
The goal of this first part is to get some warnings about missing documentation to appear in the build process. This will be done by incorporating Doxygen into the CMake build process.
Install Doxygen
If you are on Mac, use brew:
brew install doxygen
If you are on Windows/Linux, well, you’ll figure it out :)
Setting up CMake
If you’ve never used CMake, it’s easiest to start with a generator for a basic CMakeLists.txt file. Open the folder in which the project will reside in Visual Studio Code. In the Visual Studio Code extensions, install the CMake Tools extension.
Fire up the command pallate (command-shift-P) and choose CMake Quick Start. Follow the prompts and enter the project name — here we will use cpp_doxygen_sphinx. We are going to build a library instead of an exectuable - I feel it is more common for a project you would want to document.
You should find in the directory two new files: CMakeLists.txt and cpp_doxygen_sphinx.cpp. Mine look like this:
and the source file:
Test that it works using your favorite IDE or the command line:
- I always like
Xcode: in the main directory:
rm -r build
mkdir build
cd build
cmake .. -GXcode
Open the Xcodeproject in the build directory. Switch the target to build and hit the big run button.
- VS code: run
CMake: Buildcommand in the pallete. - Command line: or by heading to the
buildfolder in your main directory and run:
cd cpp\_doxygen\_sphinx/build
cmake ..
make
Using any method, make sure it builds! The output library will be in the build folder: libcpp_doxygen_sphinx.a.
Organize the directory
Organize the directory a bit, such that the structure looks like this:
include/cpp\_doxygen\_sphinx.hpp
src/cpp\_doxygen\_sphinx.cpp
And edit the files such that they read: for cpp\_doxygen\_sphinx.hpp
and the source file:
Also edit the CMake file such that it can find the sources and the headers. I edited mine as follows:
There are other ways to set up your CMake file, so don’t feel constrained here.
Check that it builds again — best is to remove the old build directory first:
rm -r build
mkdir build
cd build
cmake ..
make
Or again, using the IDE.
Add Doxygen
It’s time to start with Doxygen!
In the main directory, make a directory called docs_doxygen, and generate a starting configuration file:
mkdir docs\_doxygen
cd docs\_doxygen
doxygen -g
You will have a new file called Doxyfile. It is common to rename it to have a .in extension:
mv Doxyfile Doxyfile.in
You can edit some fields in Doxyfile.in. The following are some useful ones:
PROJECT_NAME— self explanatory, here we setcpp_doxygen_sphinx.VERBATIM_HEADERS = NO— otherwise sources for header files will be included in the docs — I usually find this redundant.GENERATE_LATEX = NO— it’s on by default, but you might not need it.EXTRACT_ALL = YES- not always on per default, but makes sure to extract undocumented sources. —EXTRACT_PRIVATE = YES- not always on per default, but required to also extract private members. —
Now the actual heart of the docs generation:
OUTPUT_DIRECTORY = @CMAKE_CURRENT_BINARY_DIR@/docs_doxygen/— Note thatCMAKE_CURRENT_BINARY_DIRis thebuilddirectory in this case.INPUT = @CMAKE_CURRENT_SOURCE_DIR@/@PROJECT_INCLUDE_DIR@— Note thatCMAKE_CURRENT_SOURCE_DIRis the main directory in this case, and we setPROJECT_INCLUDE_DIRto be theincludedirectory from before. With this option, docs will be generated from all the headers in theincludedirectory.RECURSIVE = YES— self explanatory.
This won’t run by itself, because it needs the flags from CMake to understand the input/output.
Edit your CMakeLists.txt to append to the bottom:
Here, we made a new custom build target called docs which will build the docs. You could add the ALL flag instead if you always want to build the docs (but do you really want to see all those warnings?).
You can test it using your favorite IDE:
- Using
Xcode. In the main directory:
rm -r build
mkdir build
cd build
cmake .. -GXcode
Open the Xcode project in the build directory. Switch the target to docs and you should see some errors about the docs!
- In Visual Studio, run in the command pallette
CMake: Build Targetand select thedocstarget (probably at the very bottom). - Use the command line — in the
builddirectory:
cmake ..
make docs
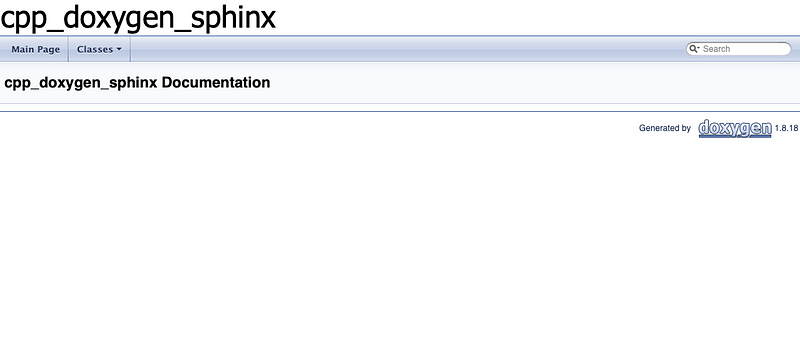
Using any method, in the build directory you should find a new folder docs_doxygen. Inside should be the html folder. Opening up index.html gives you your shiny documentation website.
You can also verify in the build/Doxyfile.out file that the INPUT and OUTPUT_DIRECTORY paths have been set correctly.
You should be getting some warnings that things are not documented like:
Compound: Foo is not documented
Great! Let’s fix that next. Edit your header to add some docs:
Build again.
Hopefully your warnings have gone away, and your index.html contains some nice(r) documentation. A screenshot of mine is below.
Next part
That’s all for this first part. We won’t try to get the Doxygen website to look any nicer — here it is just such that some warning can appear in the build telling you that you didn’t comment anything. For the actual website, we will use Sphinx/ReadTheDocs/Breathe, as described in the next part.
Contents
Oliver K. Ernst
July 1, 2020