C++ documentation with Doxygen/CMake/Sphinx/Breathe for those of us who are totally lost — Part 3
Part 3, where your monstrous creation reaches the world.

You can find the complete code here.
This is the final chapter in this 3 part series on documentation for C++ libraries in the ReadTheDocs theme hosted on GitHub . The final website is here.
-
First part. Getting some warnings about missing documentation to appear in the build process. This will be done by incorporating
DoxygenintoCMake. -
Second part. Getting an actually nice (
ReadTheDocs) website up and running. This will be done using theDoxygen/Sphinx/Breathepipeline. I won’t try to incorporate this step into theCMakefile — it’s usually done viaGitHub actionsanyways. -
[This part] Getting
GitHub actionsto automatically build and host our documentation for us.
Let’s finish this.
GitHub Actions for automagically deploying your website
This final part will be about getting GitHub actions to automagically deploy your website. See the previous part to set up the Doxygen/Sphinx/Breathe pipeline first.
The resulting website will be public to the web, even if the project is private. This is a limitation of GitHub. If you would like you can use GitLab instead, which lets you host a password protected private website for documenting your private repo, which is pretty cool!
Git
If you haven’t already, initialize a git repo for your project:
git init .
A good .gitignore would be:
.vscode/
.DS\_Store
build/
\_build/
\_static/
\_templates/
With these I was able for our toy project to just
git add .
git commit -m “Initial commit”
Obviously we need a GitHub repo, so go ahead and make one. I called mine cpp_doxygen_sphinx (surprise). See the note above if you are making it a private repo.
Use the instructions on the repo website to push your initial commit to GitHub.
GitHub Actions
GitHub Actions are fancy because there is a great marketplace of predefined actions for us to use, so we don’t have to play around with it too much.
GitHub Actions are **not** fancy because there is no good way to test your actions “offline” (except here, but it’s kind of a pain, especially because the images will be huge). You can however sort of debug them while they are running use the excellent mxschmitt/action-tmate@v2 action — more on that below.
We are going to use this great Deploy to GitHub Pages action. Go ahead and navigate there, click use latest. You can see the snippet that we will use.
To set this up, go to our main directory and make two new directories
mkdir .github
mkdir .github/workflows
All the workflows will live in here.
Make the workflow for generating our documentation — it should be a new file .github/workflows/docs.yml.
Open docs.yml and edit it such that it reads
Breaking it down:
- The action is triggered on push to the master branch. Generally you should be pushing most commits to other branches anyways, so this action should only run occasionally when the main code branch is updated. Those commented out lines can be used to disable the action.
Requirements: Some stuff comes pre-installed on the image, some doesn’t. Luckilybrewandpipdo, butdoxygenandsphinxand such — well you are on your own! The complete list of pre-installed software is here. Note that we usedpip3forpython3.Checkout repo: An important step. This didn’t use to be required, but now it is (sigh) so beware!Build docs: This builds the docs just like before, with one very important addition:
GitHub pages uses Jekyll to build it’s websites, which ignores directories that start with a _. This is a problem because many of the files we care about like .js and .css files are in the _static folder. The easy workaround is to disable Jekyll entirely with the lines:
…
&& cd \_build/html
&& touch .nojekyll
which I learned here (as always, answers to all of life’s problems can be found on stack overflow!).
Deploy:This deploys thedocs_sphinx/_build/htmlfolder.
Add it to the git repo and push:
git add .github
git commit -m “Docs”
git push
Check online ============
Check online on your GitHub page under Actions at the top. You should see the latest Docs action running (or finished). You can check the output logs of each step and see where it failed. If it throws some errors, see the next section to debug the actions.
If everything worked, you should now have a fancy GitHub page! You will notice that there is a new branch called gh-pages. This branch will look very different — it will just be the website pages.
You can find your website online at:
<https://username.github.io/project-name/>
Note that the project-name is case sensitive,
If it doesn’t show up, try going to the settings on GitHub and turning the pages on/off (select a different branch like master, and then back to gh-pages).
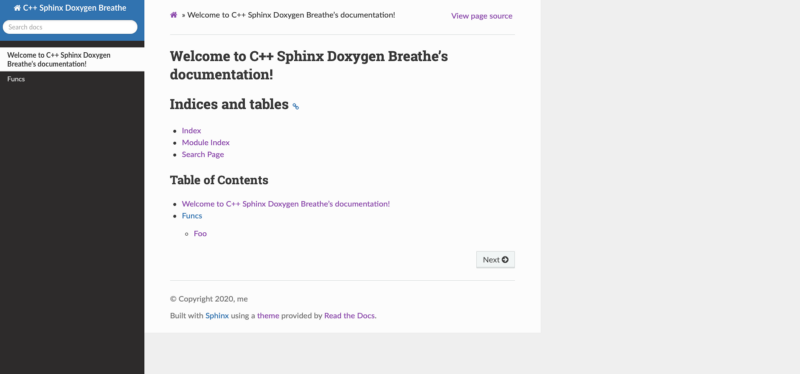
Below is mine.
Debugging your action
You can try to use here to debug the actions a little, but it is generally a headache, and probably will be easier to just edit and push.
You can sort of debug your action using tmate using the following mxschmitt/action-tmate@v2 action — create a new one called .github/workflows/ssh.yml with contents:
After you commit and push, you can navigate to the Actions page on GitHub and see the ssh address of your environment. You can ssh using a terminal and get a live way to configure and build your action. Make sure you cancel the action at some point, else it will run forever.
Note that you can disable your actions by changing them to
push:
  branches-ignore:
    - ‘**’
To save on time spent installing prerequisites, you can try to use the GitHub artifacts.
Final thoughts
Well, I hoped you enjoyed this three part tutorial.
I certainly didn’t: documentation already sucks to begin with, and there’s just way too many modules, but here we are.
But at least it ends up looking fancy, sort of.
Contents
Oliver K. Ernst
July 2, 2020