An intro to Mender — Part 2
Setting up a Mender server all your own.

This tutorial is the first part in a multi-part series on setting up OTA updates for your IoT device using Mender:
- Part 1 link — Setting up a golden device for
Mender. This entails flashing an SD card and getting started withRaspberry Pi OS(headless, i.e. without monitor/keyboard). - [This part] Setting up a
Menderserver onGoogle cloud platform(GCP). - [TBD] Setting up a device that can be deployed in the field.
- [TBD] Making an image from your current golden device and sending the update to a deployed device.
Sorry for the missing parts for now — I got bored of writing today. Check back soon for the other parts! Or drop me a line if I’m procrastinating too much….
Let’s get started with part 2.
Mender server 101
Your Mender server will host the artifacts (updates) for your IoT devices. Devices authenticate to the server and check for updates periodically (note that updates are pulled, not pushed).
There are three ways to setup a Mender server:
- Running it from your local machine. The obvious disadvantage is that it is not constantly running.
- Paying Mender to host your server. This is a great option, and may be the best option for startups in terms of ease-of-use.
- Hosting your own server somewhere using the open source version of Mender— this is the option we will pursue here.
There are many options for where to host your server — here we will use Google Cloud Platform (GCP). Another good option would be AWS, and has much of the same setup, with some menus moved around.
If you get stuck, the Mender documentation is great. Just be careful, since it defaults to the documentation for hosted Mender (hosted by Mender). The open source documentation is chosen on the menu on the left side — the current latest is here.
Another great resource is the forum if you get seriously stuck.
Create a Google Cloud Platform account and setup payment
You’re going to need a GCP account and to setup some payment information to get started. At the time of writing there is a registration “bonus” so this will initially be free — but costs can spiral up and away!
I won’t cover the details here, but you should at the end have access to the GCP console.
Create new instance on GCP
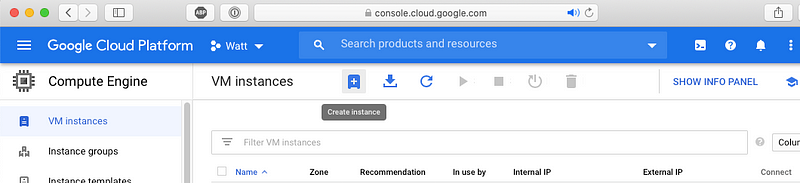
Navigate to Compute Engine/VM Instances and choose the plus at the top to create a new instance:
Choose configuration options for the server. The requirements for Mender are here. The main part for the hardware is:
A machine with Ubuntu 18.04 (e.g. an instance from AWS EC2 or DigitalOcean)…
Minimum of 10 GB free disk space and 4 GB RAM available for Mender and its services.
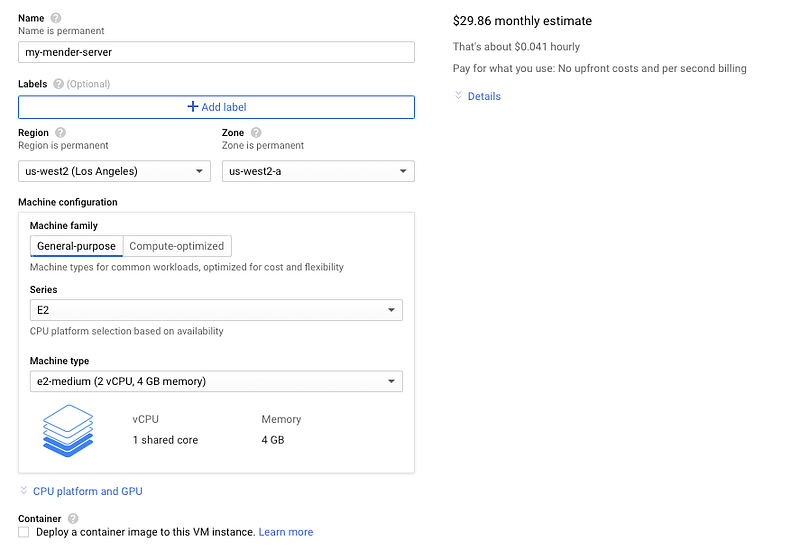
I chose a standard e2-medium (2 vCPU, 4 GB memory) machine. You can checkout the pricing here if you are worried. On the right next to the options there is also a monthly expense estimate — I get about $30 per month.
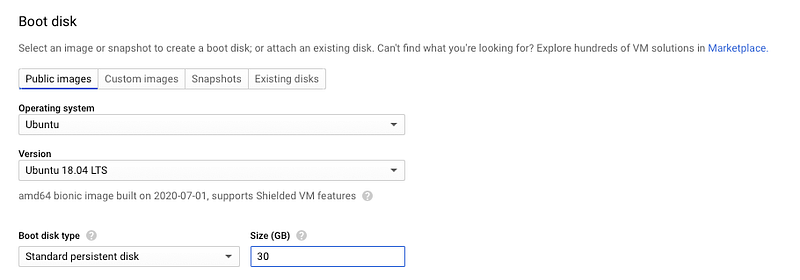
For the image, let’s go with the recommended Ubuntu 18.04 LTS just for ease of use. Make sure you choose a disk size much larger than the recommended 10GB. While that is enough to install Mender, we’re also going to use that Mender server later to convert some of the SD card images, which are… well, however large your SD card is. My recommendation is that you choose something larger than that. I chose 30GB for my 8GB SD card — a bit overkill, but roomy for our demo.
Finally, go ahead and enable HTTPS traffic already under the Firewall section.
My complete set of options looks like this:
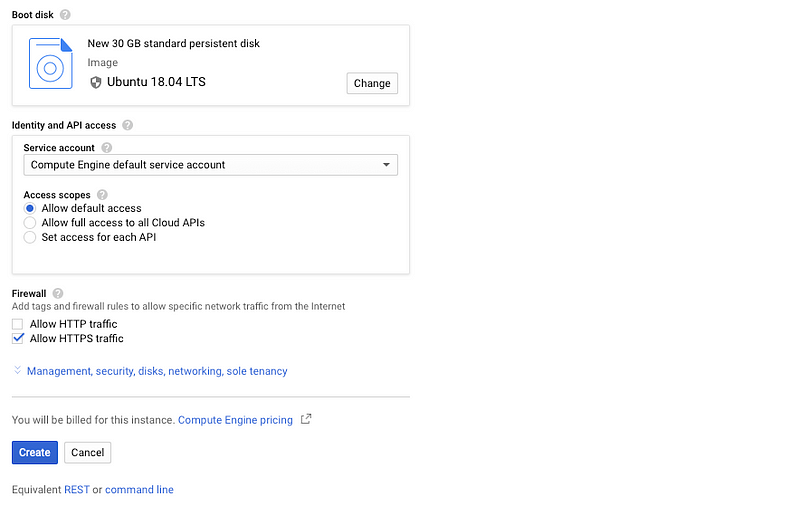
Hit create and it will appear in the list.
Set up IP, firewall and SSH
Click on the instance we just created. Under Network interfaces it will state the Exeternal IP, but this will be ephemeral (change with reboot). Let’s assign it a static IP.
Head to VPC network/External IP addresses:
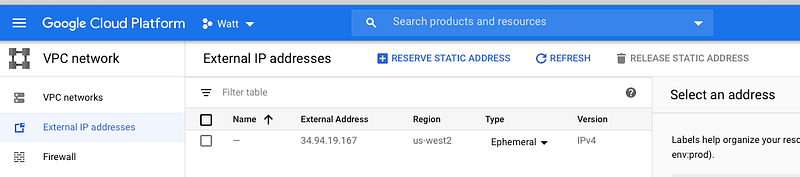
You can see that your instance has appeared. Go ahead and change the Type from Ephemeral to Static just by clicking on it in the table. Give it a sensible name — I chose my-mender-server.
While we are here we can create the Firewall rules to open ports 9000 and 443 that our Mender server needs. We already opened 443 when we chose allow HTTPS in the setup.
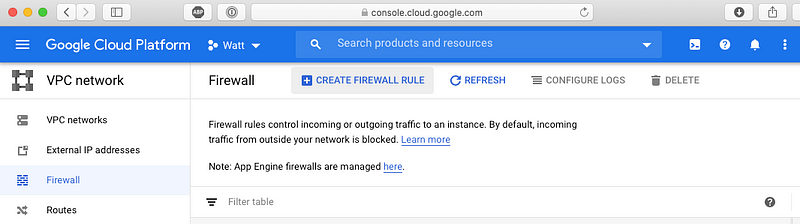
Head to the Firewall section on the same website. You will already see plenty of rules. Click the big plus at the top to add a new rule.
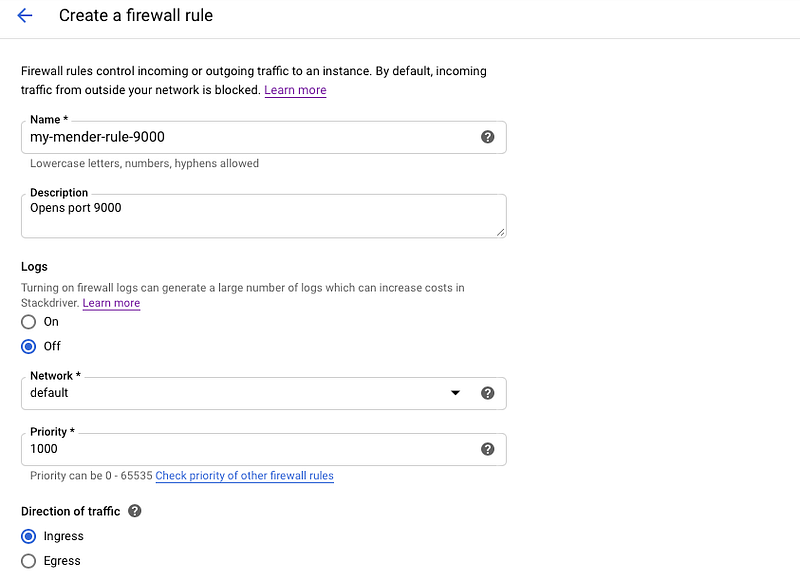
Give it any name and description. The direction of traffic we want is ingress. Under Action on match choose Specified target tags. We will make a new tag just by typing the name mender-server — but it could be any name you like (just write it down). Under Source IP ranges choose 0.0.0.0/0 to specify that any source IP is allowed. Finally, under Protocols and ports, check the box for tcp and enter port number 9000.
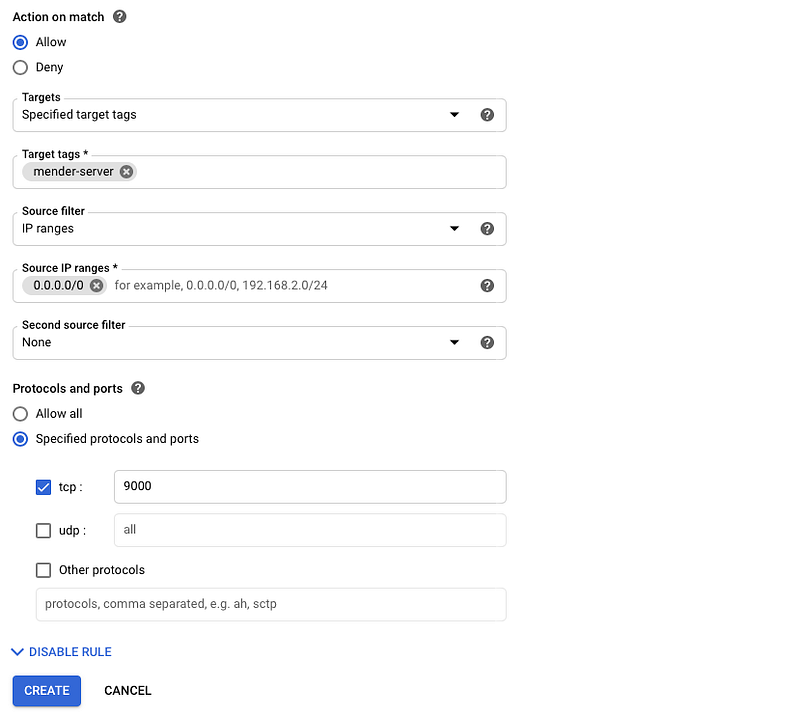
Create the rule and it will appear in the list.
Next we have to add the rule to the instance. Navigate back to your instance under Compute Engine / VM instances, click on your instance and then click Edit at the top. Scroll down to Network tags. There should already be one for https-server. Add one with name mender-server (or whatever you named the tag above).

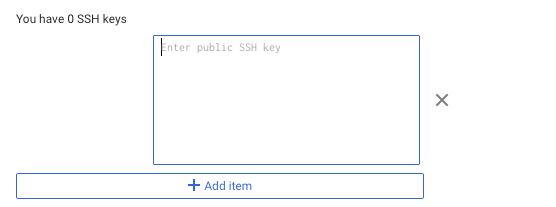
Finally, we need to be able to SSH to the server. Possibly you already have project-wide SSH keys set up on GCP — these should work out of the box. If not, when editing your VM instance, also enter your public SSH key under SSH Keys.
Hit save at the bottom.
Grab a DNS record for your server
Either you already have a domain name that you purchased, or you can assign a free domain name to your server IP address here. I chose:
my-mender-server.ipq.co
Install Mender server =========================
We will next follow the instructions to install the Mender server.
Go ahead and SSH to your instance.
We first need to install Docker Engine as described here. The easiest way is:
sudo snap install docker
Next, we also need Docker Compose as described here:
sudo curl -L "https://github.com/docker/compose/releases/download/1.26.2/docker-compose-$(uname -s)-$(uname -m)" -o /usr/local/bin/docker-compose
sudo chmod +x /usr/local/bin/docker-compose
Make sure that /usr/local/bin is in your path — it should be but you never know.
It’s useful to add yourself to the Docker group, so you don’t have to worry about running sudo with your Docker commands:
sudo groupadd docker
sudo usermod -aG docker $USER
You may find instructions that you just have to log in/out for it to work — I didn’t find that to be true, I had to restart:
sudo reboot -h now
From here we will follow the instructions fairly closely, with some comments interspersed. The overview of the setup can be summarized in the following diagram from here:
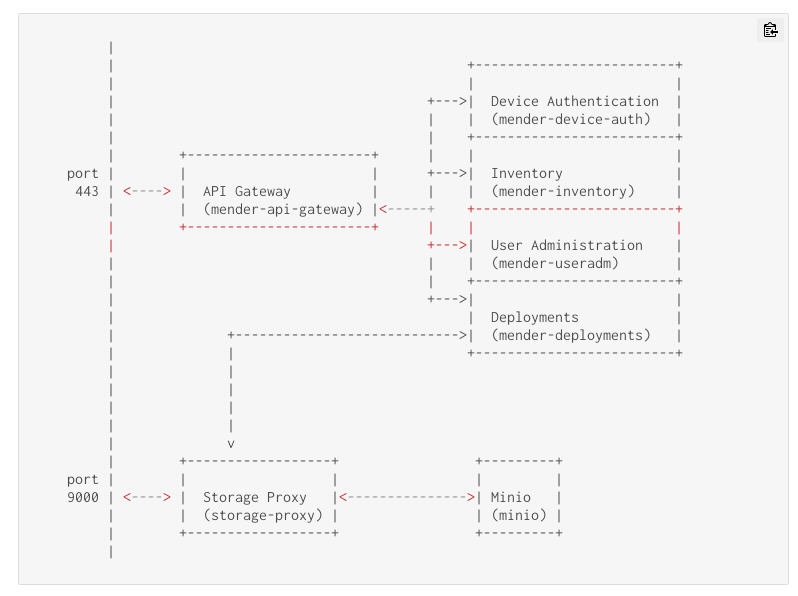
Seriously, the instructions are awesome. Read them! I will only run through them roughly.
Grab the Mender integration repo, and prepare a new branch:
git clone -b 2.4.0b1 <https://github.com/mendersoftware/integration> mender-server
cd mender-server
git checkout -b my-production-setup
and prepare the configuration .yml file by copying it from the template, and download the necessary requirements:
cd production
cp config/prod.yml.template config/prod.yml
./run pull
Next, set up the domain name of your server:
API\_GATEWAY\_DOMAIN\_NAME=my-mender-server.ipq.co
(note: no quotes here!) and set some other flags:
STORAGE\_PROXY\_DOMAIN\_NAME=”$API\_GATEWAY\_DOMAIN\_NAME” # change if you are hosting the Storage Proxy on a different domain name (not the default)
CERT\_API\_CN=$API\_GATEWAY\_DOMAIN\_NAME CERT\_STORAGE\_CN=$STORAGE\_PROXY\_DOMAIN\_NAME ../keygen
Next, create the Docker volumes that will host:
mender-artifacts— artifact objects storage
mender-db— Mender services databases data
docker volume create --name=mender-artifacts
docker volume create --name=mender-db
You can check it worked:
docker volume ls
Set up Minio for hosting the artifacts (updates). You will need pwgen:
sudo apt install pwgen
and then:
MINIO\_SECRET\_KEY\_GENERATED=$(pwgen 16 1) && echo $MINIO\_SECRET\_KEY\_GENERATED
Finally, set lots and lots of options in your configuration file prod.yml as detailed here:
sed -i.bak "s/MINIO\_ACCESS\_KEY:.*/MINIO\_ACCESS\_KEY: mender-deployments/g" config/prod.yml
sed -i.bak "s/MINIO\_SECRET\_KEY:.*/MINIO\_SECRET\_KEY: $MINIO\_SECRET\_KEY\_GENERATED/g" config/prod.yml
sed -i.bak "s/DEPLOYMENTS\_AWS\_AUTH\_KEY:.*/DEPLOYMENTS\_AWS\_AUTH\_KEY: mender-deployments/g" config/prod.yml
sed -i.bak "s/DEPLOYMENTS\_AWS\_AUTH\_SECRET:.*/DEPLOYMENTS\_AWS\_AUTH\_SECRET: $MINIO\_SECRET\_KEY\_GENERATED/g" config/prod.yml
sed -i.bak "s/https:\/\/set-my-alias-here.com/https:\/\/$STORAGE\_PROXY\_DOMAIN\_NAME:9000/g" config/prod.yml
sed -i.bak "s/set-my-alias-here.com/$STORAGE\_PROXY\_DOMAIN\_NAME/g" config/prod.yml
sed -i.bak "s/my-gateway-dns-name/$API\_GATEWAY\_DOMAIN\_NAME/g" config/prod.yml
Finally, inspect your **config/prod.yml** file— I had some places where the URL was something like:
https://"my-mender-server.ipq.co":9000
Obviously, this won’t work — get rid of the quotes here.
Fire up your Mender server
Fire it up:
./run up -d
You can verify all the services started:
./run ps
You can visit your server:
<https://my-mender-server.ipq.co>
Make sure you prepend **https://**. You should see:
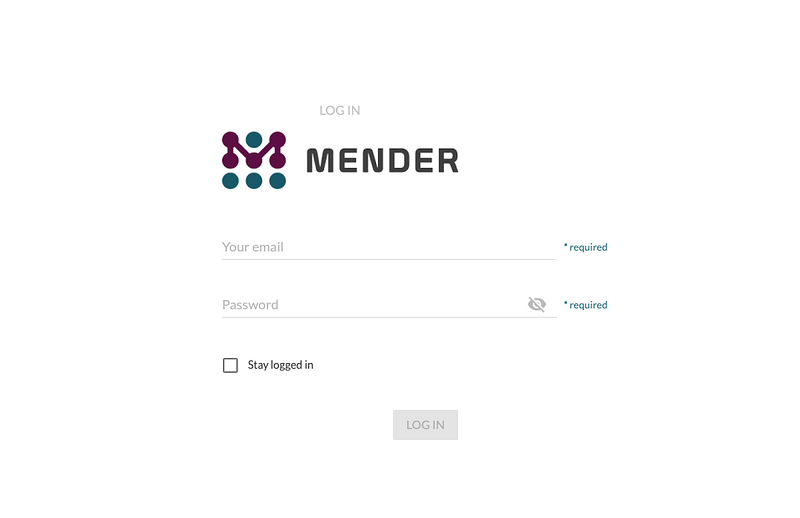
You can create your first user:
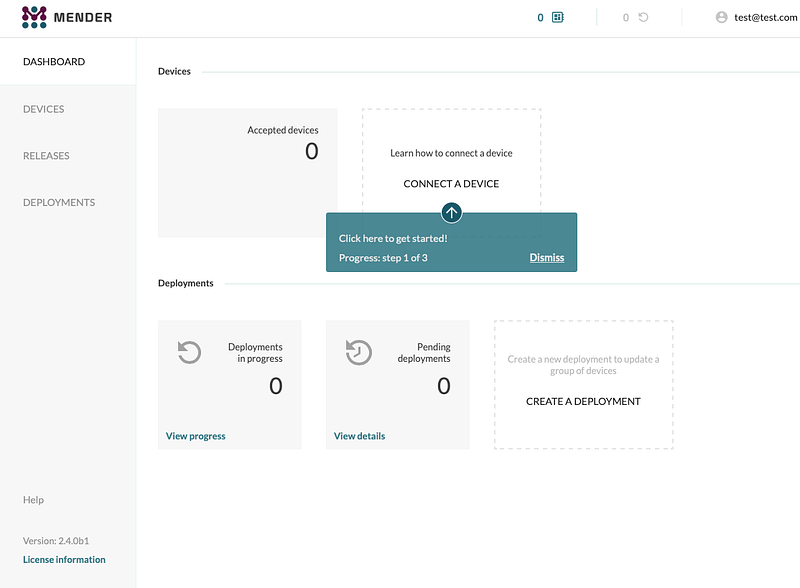
./run exec mender-useradm /usr/bin/useradm create-user --username=test@test.com --password=password
I hope it worked and you get to:
Cleanup
If you want to stop or take a break, here is the cleanup:
To stop your server:
./run down
Also remember to stop the instance on GCP at some point, or you will keep getting charged! Just hit the big stop button in the console.
Final thoughts
That’s enough to get your Mender server up and runnig. In the next part, we will set up a device deployed in the field and register it to the server.
I got bored of writing today, but check back for the other parts in the coming weeks! Leave me a note if you think I’m procrastinating too much until then.
Contents
Oliver K. Ernst
July 11, 2020