Regular backups for your Cloud Firestore database and Storage
How close do you have get to deleting everything in your database before you set this up?

I’ve gotten close — not deleting everything, but a nice large collection. Even worse, in the production database, not the development one…. Somehow it all went wrong while writing tests intended for the development database, and a collection was deleted in the production version. Luckily, this time we were able to restore the damage before chaos erupted, but next time, well….
We’ll use Cloud Functions for the backups — another approach is with GitHub Actions or GitLab CI to regularly run the backups, but in this tutorial we only need the native Google products.
The Cloud Function
We’ll follow Google’s suggested backup function, updated a bit for TypeScript:
Here, we support both production and development databases — the development database so you can test, obviously! Update:
PRODUCTION_PROJECT_ID— project ID for your production database.BUCKET_NAME_PRODUCTION— the bucket name for the production database.BUCKET_NAME_DEVELOPMENT— as above for the dev. database.
You can update the collectionIds to limit the backup to certain collections, or leave it empty to back up everything.
The corresponding entry in your index.ts should be something like:
where you can adjust the frequency of the updates.
The Bucket
Head to Google Cloud Storage and create a new bucket.
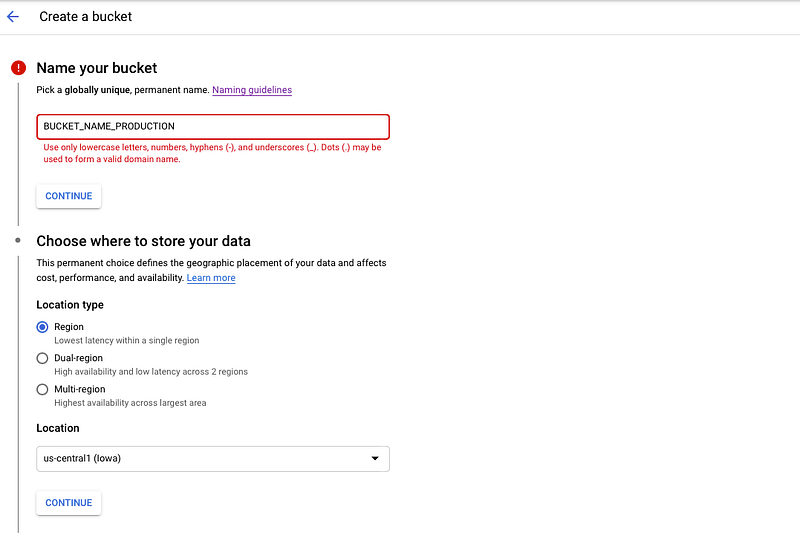
For the location, choose the single Region that your Firestore database is also is in (otherwise, you’ll get an error in your cloud Functions!)
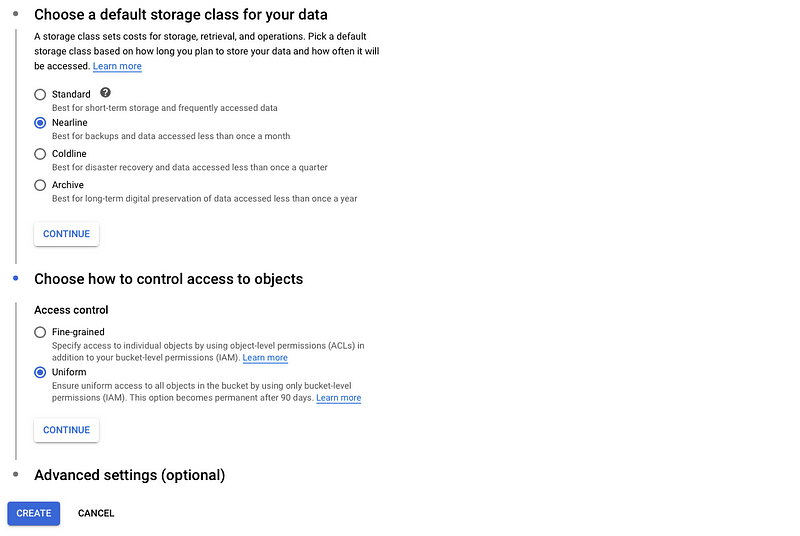
For the storage class, choose Nearline since it is “best for backups”. Finally, uniform access control makes sense for backups.
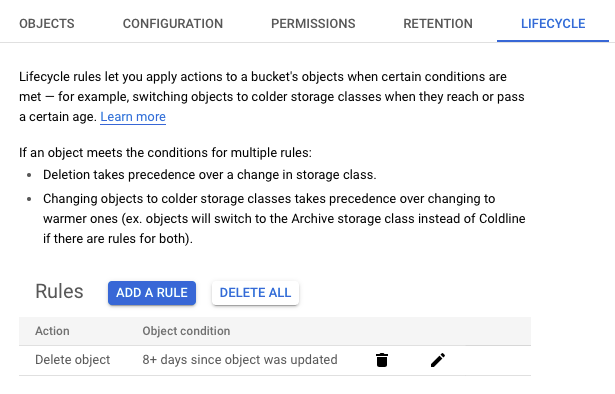
After creating the bucket, you can set a lifecycle on the objects in it, for example that they are deleted when they are older than a week. This way, you can optimize storage for the backups.
Finally, you need to set the permissions. Under IAM & Admin, you need to edit the Roles for the appropriate account. Some places you may find that the correct account is: PROJECT_ID@appspot.gserviceaccount.com , but I found the correct service account for my database is: firebase-adminsdk-95pcq@PROJECT_ID.iam.gserviceaccount.com . Add the roles:
- Cloud Datastore Import Export.

- Storage Admin so you can write to the bucket.

You’ll have to repeat these steps for your production and development databases.
Testing your backups
Head to Cloud Scheduler, find your scheduled backup function and hit Run Now . After a brief wait, you should find a folder in the bucket with a timestamp containing the storage backup.
To roll back your update, you can use this gcloud command.
Backing up Storage, e.g. images
You will notice that the backup hasn’t included anything under Storage in the Firebase console — only the Cloud Firestore collections are backed up. These are already in a storage bucket called PROJECT_ID.appspot.com . You can back this up as well — back up one bucket to another bucket.
First, create a new bucket to hold your backups. You can use the same settings as before for the location/storage class/access control.
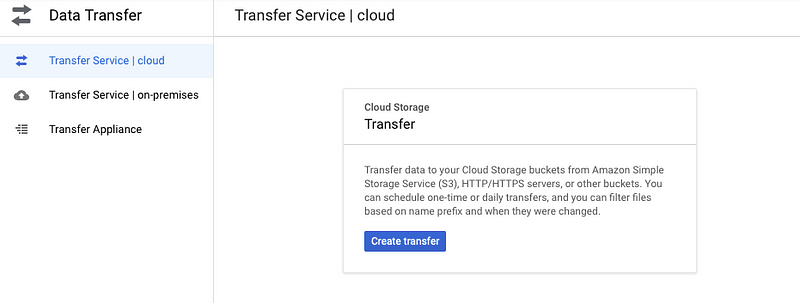
The GCP native solution for backing up one bucket to another is called Data Transfer. There are two options:
- Create the backup system once, and have it run regularly. Limitation: it can only run once or daily — there is no other frequency option.
- To get around the frequency limitation, you can create a Google Cloud Function that with a custom frequency creates the data transfer and runs it once.
We’ll go through the first version here in the console to see how it’s done.
First: create an initial backup of all files
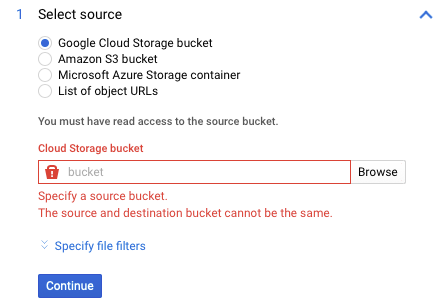
Head to Data Transfer and create a new transfer:
Select your source bucket as PROJECT_ID.appspot.com . Don’t put anything under filters so we back up everything for now.
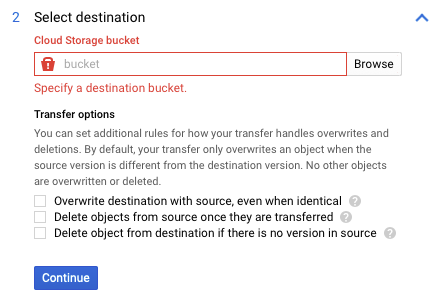
For the destination bucket, select whatever new bucket name you’ve created. Again, do not choose any transfer options.
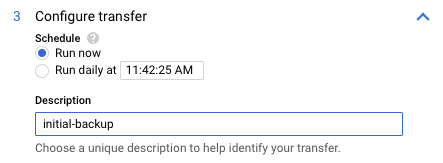
Finally, set it to run once:
This should run your initial backup! Wait for it to finish.

Second: set up daily regular backups for files that have changed in the past 24 hours.
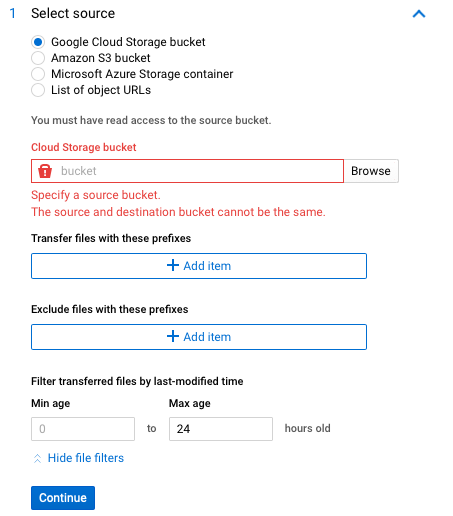
Create another data transfer job. For the source bucket, choose the same one again, but now, under filters, set the Max age to 24 hours old for the filter on the source files. This is only because we’re gonna run it daily — so you only need to back up the files that have changed in the past 24 hours!
For the destination bucket, again select the bucket you created. Again, make sure you do not select the options:
- Do not check “Overwrite destination with source, even when identical”. This is because “By default, your transfer only overwrites an object when the source version is different from the destination version”, so there’s no need for overwrites.
- Do not check “Delete object from destination if there is no version in source” — this doesn’t make sense when combined with the 24 hour max age for the source items. You’ll get an error anyways if you try to create it.
- Do not check “Delete objects from source once they are transferred” — otherwise, you have deleted the source!
For the transfer interval, give it a good name and select it to run daily.

Final thoughts
Pretty easy! I hope you now feel more confident that your user’s data is safe! If you need to pursue a custom schedule for the backups, the API should be useful (it used to be called Storage Transfer instead of Data Transfer).
Contents
Oliver K. Ernst
September 21, 2020